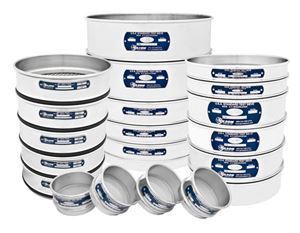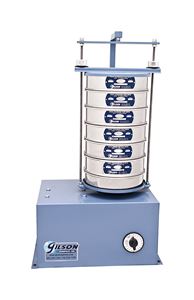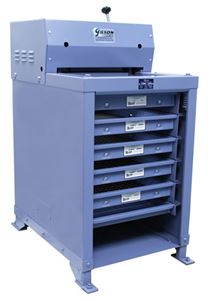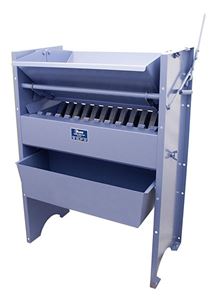
Test sieves are simple devices, but they are still scientific instruments and the most cost-effective and widely used particle sizing and gradation testing method. This blog article will cover the accuracy verification of sieves, agitation and sieve shakers, accessories, and wet-wash sieves.
How Do I Know My Sieves are Accurate?
When you look at the mesh of a test sieve and realize there are dozens or maybe thousands of individual openings, your first question is probably, “How can this be an accurate instrument?”. The truth is, there is no reasonable way to guarantee that every single opening is exactly the specified size. Still, there are ways to mathematically predict overall conformance by measuring a certain number of apertures and using statistical forecasting to judge the level of accuracy.
ASTM E11 and ISO 3310-1 use this method to classify test sieves into three different levels of accuracy. Verification of sieves is a specific method that precisely measures a selected number of openings in the mesh surface and calculates the probability of their size ranges using statistical methods. The sieve mesh is scanned by an automated NIST traceable optical comparator that produces a complete statistical analysis following ASTM/ISO requirements.
- Compliance sieves are standard, “off-the-shelf” test sieves. Openings on samples of the bulk wire cloth are measured, but not those of individual sieves. Each sieve includes a certificate of manufacturing conformance. Compliance sieves have a statistical confidence level of 66% that the opening sizes and wire diameters meet the requirements of ASTM/ISO and are acceptable for applications where a standard degree of accuracy is sufficient.
- Inspection sieves have specified openings and wire diameters measured, and statistical calculations are performed on each sieve to confirm acceptable accuracy to a confidence level of 99%. Inspection sieves are best for applications where an enhanced level of accuracy is needed or when documentation of accuracy is required.
- Calibration sieves have about twice as many openings and wires measured as inspection sieves, and the statistical accuracy is at a confidence level of 99.73%. Calibration sieves have the highest level of accuracy and are best used as reference instruments to calibrate working sieves.
Verification of new test sieves to either of the two superior grades can be specified when ordering new sieves. Re-verification is a similar process that is performed to check the performance of used sieves. Both methods can be part of an internal quality control/quality assurance program.

Master-Matched sieves are measured and selected to match sieves from a master set maintained at the manufacturer’s laboratory. These sieves are an excellent choice when uniformity and repeatability between multiple sieve sets in different locations are essential. Master-Matched Sieves from No. 8 (2.36mm) to No. 325 (45μm) are verified to meet ASTM E11 and then performance tested with NIST traceable Standard Reference Materials to correlate with the master set.
ASTM E2427 outlines methods to check the performance accuracy of working sieves with standard reference materials (SRMs) or user-prepared reference samples. SRMs are glass beads carefully measured and sampled on equipment traceable to NIST. After passing the reference materials over a working sieve and an equivalent inspection or calibration grade reference sieve, calculations will determine the accuracy of the working sieve.
SRMs can also measure the average aperture on a sieve using the calibration graph provided. Monitoring results of reference material testing over time provides information on when the sieve has worn enough to be taken out of service. This previous Gilson blog post discusses the use of reference materials to determine sieve performance.
Sieving Agitation
An accurate sieve will not continue producing accurate and repeatable results unless adequately maintained. Many standard test sieving methods allow manual agitation, with one person manually shaking the test specimen in one sieve at a time with a pan and cover. These procedures may be acceptable for separations when results are not critical, but manual agitation has notoriously poor repeatability and accuracy. The method does not consider an individual technician's physical size, strength, or other factors, and testing samples with one sieve at a time is inefficient.
At a minimum, any sieve shaker reduces or eliminates single-operator differences over manual methods and improves efficiency by agitating multiple sieves simultaneously and consistently. Selecting a sieve shaker compatible with the characteristics of the sample material further enhances accuracy and repeatability while making the sieving process much more efficient. Materials from fine powders to coarse aggregates all respond differently to mechanical, vibratory, or sonic sieve shakers and to shakers with or without tapping actions. A previous Gilson blog post provides advice on selecting the best sieve shaker for your application.
Sieving Accessories
Collecting, weighing, and calculating sieve fractions can be tedious and time-consuming. Fortunately, there are some accessories to streamline the process.
- Sieve pans and covers are more necessities than accessories, and they make the testing process more effective. Pans collect fines from the sieving process, but they are also crucial when handling the sample and sieve stack to prevent the loss of fines. Sieve covers are required when using some types of sieve shakers and serve as temporary protection from contamination and changes in moisture conditions.
- Clean-N-Stor units are essentially mounted funnels that accept an inverted sieve for clean-out and brushing. They are positioned over a pan or weighing scoop on a scale or balance and can eliminate multiple steps in the cleaning/weighing process.
- Sieving flow agent is a very lightweight silicon dioxide powder that can be added to difficult sieving samples to prevent issues with static and humidity. It has minimal effect on fraction weights and results in an overall improvement in separation accuracy.
- Sieve spacers are clear acrylic rings that can be inserted into a stack of sieves to allow visual observation of the sieving action. The spacers are machined to a precise size to nest with metal test sieves.
- Sieve seal gaskets are O-rings that fit the skirt of test sieves and prevent the loss of fines when testing fine, dusty powders or for wet sieving operations.
Sieve Cleaning & Maintenance
Maintenance of sieves requires attention to detail but not a massive outlay for equipment. A thorough but gentle brushing of each sieve during the sieving test itself serves two purposes. The first is to recover as much of the retained fraction as possible to ensure accurate results. The second is to make sure no particles remain lodged in the mesh to block (blind) the mesh openings and interfere with future tests. It is essential to resist the urge to use one brush for all sieves. We recommend selecting a sieve brush stiff enough to do a thorough cleaning but soft enough to avoid damaging the mesh. Under no circumstances should any object be used to “poke” a lodged particle out of the wire mesh. Damage is almost guaranteed!
Cleaning sieves between uses minimizes cross-contamination and prolongs the life of finer meshes. Ultrasonic sieve cleaners are a safe and efficient way to clean sieves completely.
Periodic inspections of test sieves will reveal damaged wires, distorted openings, and excessive wear. Sieve inspection tools include magnifiers to look for damage and special tools for measuring mesh openings.
Finally, keeping test sieves stored vertically in a proper storage rack assures they are out of the way and less likely to be damaged. Damage to the mesh can occur when a sieve is left exposed on a benchtop. Dropping a sieve can distort the frame to an extent where it will no longer nest with other sieves.
Wet-Wash Sieves
Certain dry materials are challenging to sieve because the material may clump, be affected by static attraction, or have a high fines content that interferes with accurate separation. Wet sieving methods can avoid issues with these problem materials. In simple wet sieving methods, a sample is soaked for some time, introduced to a sieve under a gentle stream of water, and rinsed until the discharge water is clear. The remaining material is dried back and weighed to determine the percent retained. Any material smaller than the openings of the wash sieve is lost.
Any test sieve is suitable for wet sieving, but the design of wet-washing sieves takes full advantage of the process. Models are available with deep frames that prevent spillage and drain holes. Mesh and frame material options are similar to conventional test sieves, but the frames are available in a variety of depths that prevent the loss of wash water. As with other test sieves, stainless steel wet-wash sieves are a durable and corrosion-free choice for most applications. A selection of wet sieving accessories is available for increased convenience. Aggregate washers automate the washing process, using water fed into a rotating, inclined drum to flush fines out over a sieve gently.
As you might expect, Gilson is a significant resource for useful information on sieves and sieving. Below, we have listed links to a selection of related videos and previous blog articles.
Related videos:
Re-Verification of Used Sieves
Gilson Laboratory Rotary Sifters
Cumulative vs. Fractional Method of Sieve Analysis
Related blog posts:
Reference Materials for Test Sieves
Wet Sieving: A Practical Guide
Selecting the Right Test Sieve for Non-Conventional Use
Sieve Analysis of Coarse Aggregate: From the Field to Lab
An Expert Guide to Selecting a Sieve Shaker
We hope this article for test sieves helps you understand sieving equipment and how to select it.
Gilson Is Here to Help
Contact our testing experts for more information or to discuss your testing application.
Testing Resources
Standard Test Methods, Specifications, and Practices
Individual test methods and specifications referenced in our product descriptions, blog articles, and videos are available for review or purchase from the professional organizations noted.
- ASTM International (American Society for Testing and Materials)
- AASHTO (American Association of State Highway and Transportation Officials)
- ACI (American Concrete Institute)
- State DOTs (Departments of Transportation)
- ISO (International Organization for Standardization)
- BS (British Standards)
- EN (European Standards)


