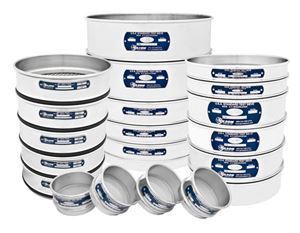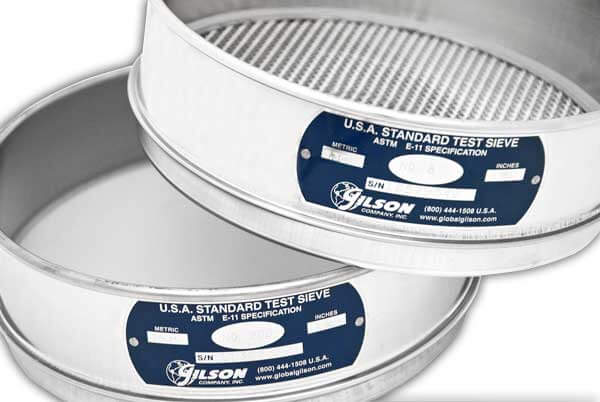
Everyone wants their sieves in service as long as possible, and that means as long as they meet applicable standards. Gilson Test Sieves are guaranteed to meet ASTM or ISO requirements for Compliance, Inspection, or Calibration grades when they’re shipped, but eventually, wire cloth stretches, sags and tears occur, and abrasive materials reduce wire diameter, increasing opening sizes.
How do you replace your sieves before it’s too late? That’s a question we hear all the time, and there’s no quick or easy answer. But the best place to start is with an ongoing, in-house quality control program. Here, we’ll help you get started implementing this type of program.
Establish a Master Set
It’s best to start a quality control program by establishing a dedicated Master Reference Set of Inspection or Calibration test sieves.
The Master Set serves as the basis for a performance comparison of Working Sieves, gauging wear, and scheduling replacements. Inspection and Calibration grade sieves are provided with detailed verification reports to assure compliance with the American Society for Testing and Materials (ASTM) or the International Organization for Standardization (ISO) with measuring devices traceable to the National Institute of Standards and Technology (NIST). It’s a lot of information to keep track of so we recommend keeping all this valuable documentation organized using a system compatible with your organization’s practices. That way, it’s readily available for periodic reviewing and auditing.
The verification report for each Inspection or Calibration grade sieve includes the following:
- Serial number
- Record of the measurements performed
- Statistical analysis proving compliance with appropriate ASTM or ISO specifications
- Description of the measuring devices used and traceability to NIST
Create Comparative Working Sieve Sets
Working Sieve Sets should be used for day-to-day testing. Routine, periodic comparison to the Master Set allows you to detect the point when the Working Sieves no longer meet the specifications. Not only does this ensure maximum service life for Working Sieves, but it also minimizes the disruption of sending test sieves off-site for verification. Most importantly, it can prevent test results that are not accurate, precise, or reliable.
If you choose to evaluate the performance of the sieves together as a stack, it’s important that the sieves are always evaluated together as a complete stack. The best way to do this is to record the serial number of each sieve in the stack and double-check these records before any comparison is done. One sieve in the wrong stack can corrupt all of your results. You can also check the performance of individual sieves by comparing them one at a time directly to the equivalent Master Sieve.
Compare Each Working Sieve Set
Comparative testing of the Working Sets gives you a way to identify test sieves that are out of tolerance and need to be replaced. The first comparison between Master and Working Sieve Sets also helps establish a baseline relationship between the sets. As the working Sieves wear and age, each subsequent performance check will reveal an increased variation from its first comparison to Master Sieve.
For example, the initial comparison may show that the Working No.10 sieve deviated from the results of the Master No. 10 sieve by 1.5%. The percent of deviation is likely to increase over time, and when it approaches 3.5% (a 2% increase or more), you may decide the sieve is no longer acceptable for use. Most quality control programs have an acceptable variation of ±1% to 3% from Master Sieve. To compare your sets:
- Start with a sample large enough to be split into several representative portions, one for each set of Working Sieves to be compared, plus the Master Set
- Follow accepted sample dividing methods for your material to ensure the samples are truly representative
- Process one sample through the Master Sieve Set and record results for later reference
- Test the remaining through the Working Sieve Set(s)
Use Standard Reference Materials when necessary
User-prepared materials are non-standard and therefore are not directly traceable to any source, so they require more handling to prepare. They may also be more difficult to duplicate and verify for regular re-evaluations. While there are advantages to using materials you regularly work with, there’s also another option: Standard Reference Material (SRMs).
SRMs are precisely sized glass beads or powders used to test the performance of sieves and to establish effective opening sizes. They’re created under equipment that’s traceable to NIST or the European Community Bureau of Reference (BCR), so their uniformity and reliability are without question. SRMs can be invaluable to your internal quality control program. Although relatively expensive, SRMs may be a wise investment since they’re easily adopted into internal quality control programs.
Remember, in-house quality control is a process
Instituting an in-house quality control program begins by creating a Master Set of new Inspection or Calibration sieves as a benchmark. Establishing a reliable baseline is critical for the initial comparison with the Working Sieves, so it’s important to use new Compliance Grade sieves to build up the Working Sets. The process continues with commitment, documentation, and attention to routine details like a visual inspection of every sieve before it’s used. It’s also important to never put a sieve away until it’s properly cleaned. Your quality control commitment with scheduled inspections and performance testing provides a reliable measure of a test sieve’s accuracy and compliance with ASTM or ISO standards. With these elements in place, you can answer the question: How do you replace your sieves before it’s too late?
Gilson Is Here to Help
Contact our testing experts for more information or to discuss your testing application.
Testing Resources
Standard Test Methods, Specifications, and Practices
Individual test methods and specifications referenced in our product descriptions, blog articles, and videos are available for review or purchase from the professional organizations noted.
- ASTM International (American Society for Testing and Materials)
- AASHTO (American Association of State Highway and Transportation Officials)
- ACI (American Concrete Institute)
- State DOTs (Departments of Transportation)
- ISO (International Organization for Standardization)
- BS (British Standards)
- EN (European Standards)
